Containerization has become a cornerstone of modern software development, allowing developers to create, deploy, and run applications reliably across different computing environments. Docker, a leading platform in this space, has gained immense popularity for its simplicity and efficiency. In this guide, you’ll learn the basics of Docker, how to set it up, and how to use it to build and deploy applications effortlessly.
What is Docker?
Docker is an open-source platform designed to automate the deployment of applications inside lightweight, portable containers. Containers are standalone, executable packages that include everything needed to run an application code, runtime, libraries, and system tools ensuring consistency across various environments.
Comparing Containers and Virtual Machines
Containers and virtual machines have similar resource isolation and allocation benefits but function differently because containers virtualize the operating system instead of hardware. Containers are more portable and efficient.
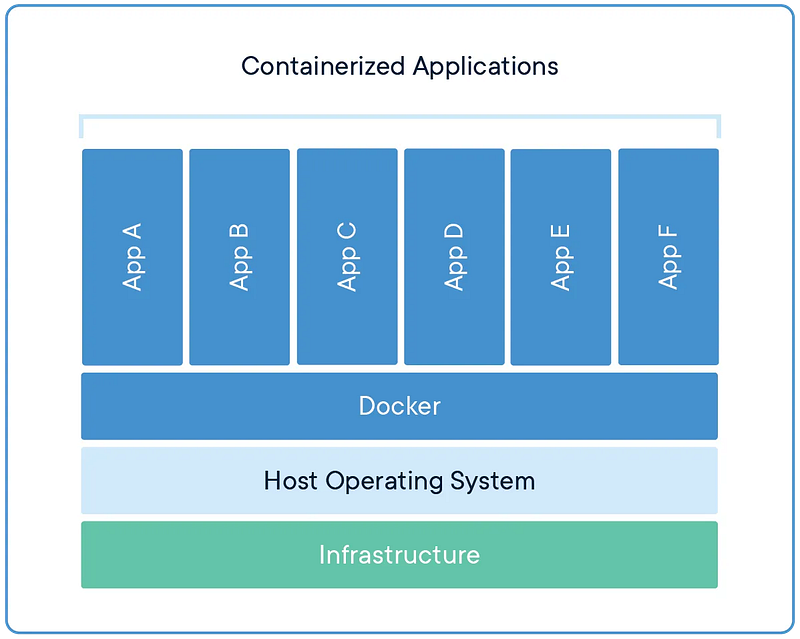
CONTAINERS Containers are an abstraction at the app layer that packages code and dependencies together. Multiple containers can run on the same machine and share the OS kernel with other containers, each running as isolated processes in user space. Containers take up less space than VMs (container images are typically tens of MBs in size), can handle more applications and require fewer VMs and Operating systems.
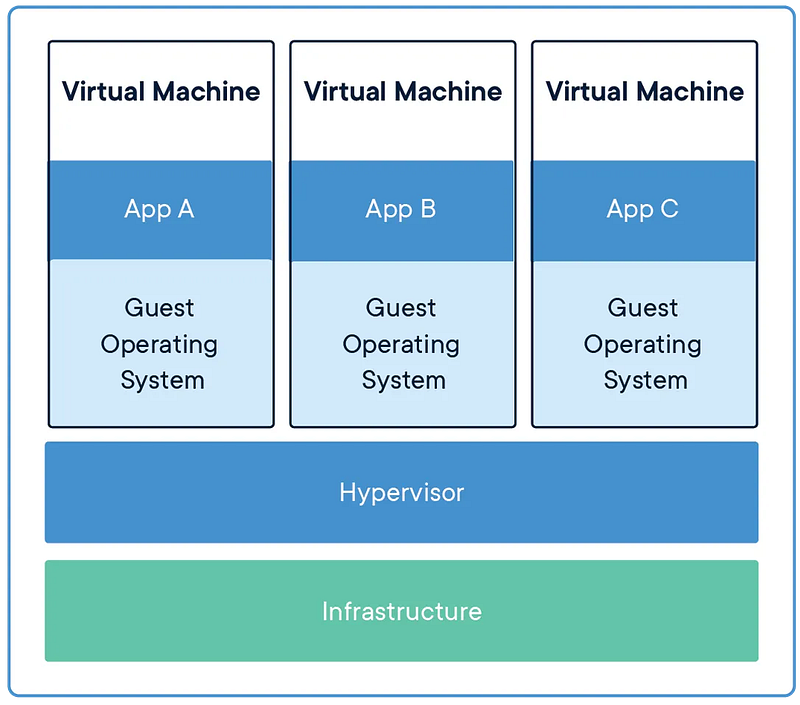
VIRTUAL MACHINES Virtual machines (VMs) are an abstraction of physical hardware turning one server into many servers. The hypervisor allows multiple VMs to run on a single machine. Each VM includes a full copy of an operating system, the application, necessary binaries and libraries — taking up tens of GBs. VMs can also be slow to boot.
Benefits of Using Docker
- Standard: Docker created the industry standard for containers, so they could be portable anywhere
- Consistency Across Environments: Docker ensures that the application behaves the same way on all systems, eliminating the “works on my machine” problem.
- Resource Efficiency: Containers share the host system’s kernel and resources, making them more efficient than traditional virtual machines.
- Simplified Deployment: Docker packages applications and their dependencies into a single container, simplifying the deployment process.
- Secure: Applications are safer in containers and Docker provides the strongest default isolation capabilities in the industry
🧠 Key Docker Concepts
Before diving into Docker, it’s essential to understand some key concepts:
- Docker Host: refers to the physical or virtual machine where Docker is installed and running. It is responsible for providing the environment in which Docker containers are executed. The Docker Host can be a local machine, a server in the cloud, or any system capable of running Docker. It manages resources like CPU, memory, and storage for containers.
- Docker Daemon: is the background process that runs on the Docker Host and manages Docker objects like containers, images, volumes, and networks. It listens for API requests (through the Docker CLI or other tools) and interacts with the operating system to create and manage Docker containers.
- Docker Images: These are the blueprints for containers. An image contains the application code and all the dependencies it needs to run.
- Docker Containers: A container is a runtime instance of a Docker image. It includes everything required to run the application, isolated from other containers and the host system.
- Docker Registry: A service where Docker images are stored and distributed. Docker Hub is the default public registry where you can find and share images.
- Docker Volumes: These persist data generated and used by Docker containers. Volumes are stored on the host filesystem and are independent of the container’s lifecycle, meaning they are not removed when the container is deleted.
⚒️ Installing Docker
Docker can be installed on various platforms, including Windows, macOS, and Linux. Here’s how to get started:
Prerequisites
- Supported OS: Ensure your system runs a supported version of Windows, macOS, or Linux.
- Admin Privileges: You need administrative privileges to install Docker.
Installation Steps
For Windows and macOS
- Download Docker Desktop from Docker’s official website.
- Run the installer and follow the on-screen instructions.
- After installation, launch Docker Desktop.
For Linux
Follow installation instructions on https://docs.docker.com/desktop/install/linux/
Verifying the Installation
Run the following command to check if Docker is installed correctly:
docker --version
You should see the Docker version information displayed.

🧪 Getting Started with Docker
Let’s run our first Docker container to see Docker in action.
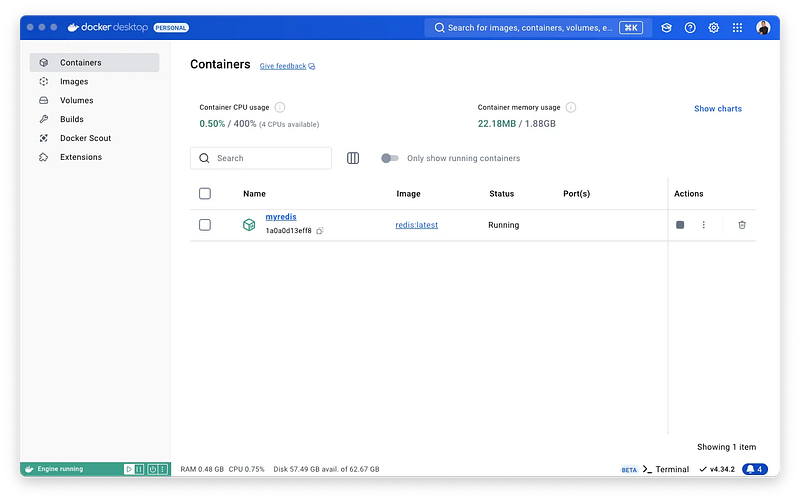
🔷 Docker Desktop
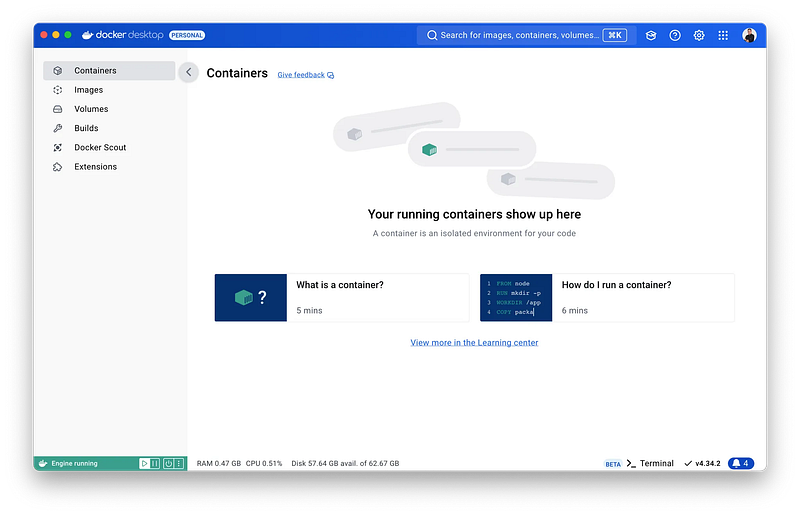
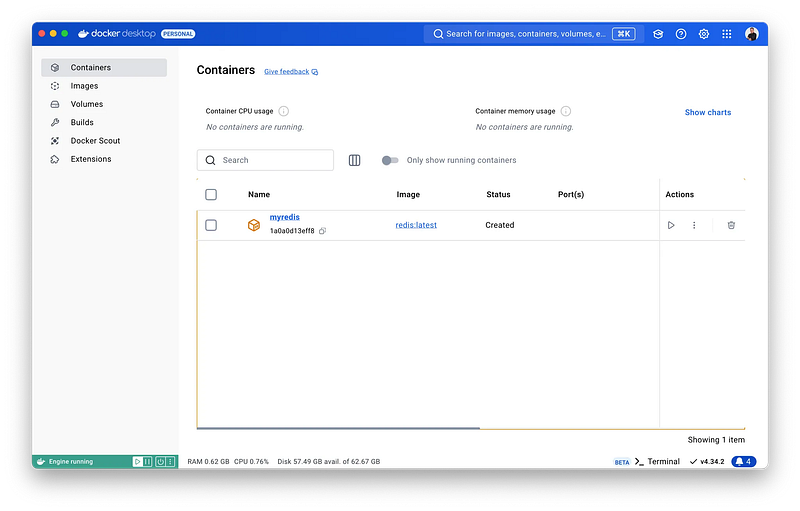
Once Docker Desktop is running, the graphical interface allows you to explore containers, images, volumes, and other features.
However, it’s recommended to start with the command line (CLI) to gain a deeper understanding and hands-on experience with Docker commands.
❇️ Running Your First Container
- Open a terminal or command prompt.
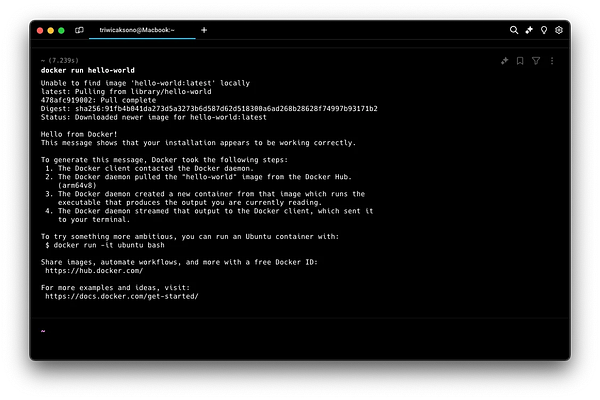
- Run the following command to pull and run a simple Docker image: This command does the following:
docker run hello-world
- Pulls the
hello-worldimage from Docker Hub. - Creates and runs a new container using this image.
- Displays a “Hello from Docker!” message if everything is set up correctly.
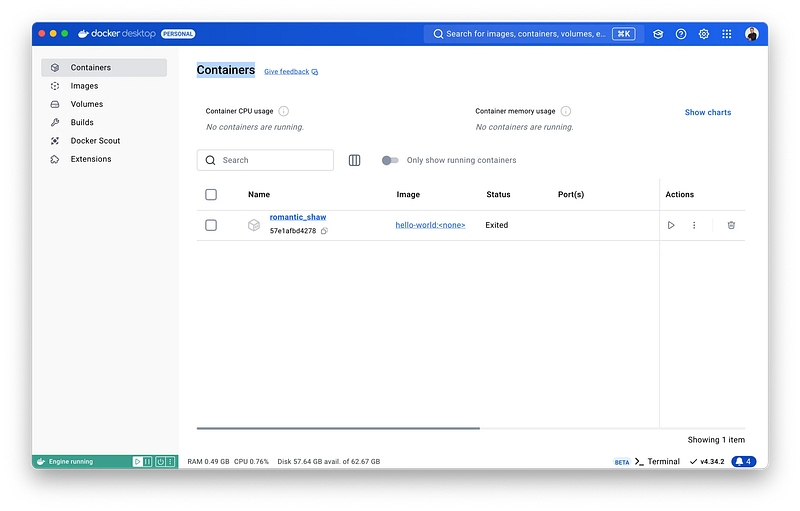
hello-world image downloaded on your docker images list💿 Docker Image
Docker image is a lightweight, standalone, and executable package that includes everything needed to run a piece of software, such as code, runtime, libraries, environment variables, and configuration files. Docker images are the building blocks of Docker containers, which run instances of these images.
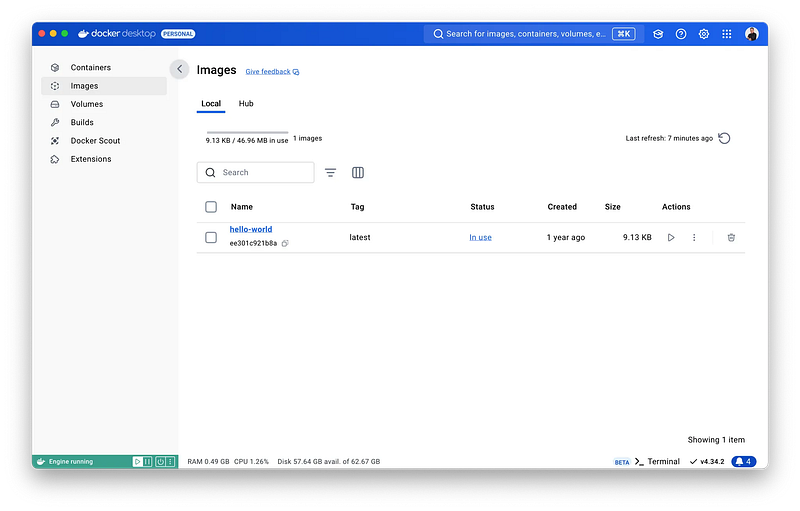
📋 List All Image
Show all docker images.
Command:
docker image ls

or

docker images
- Example

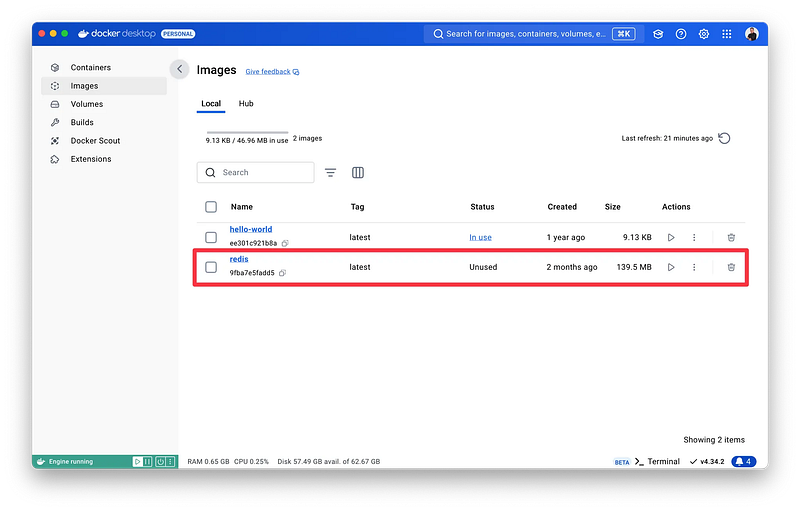
⏬ Download Image
Download docker images from the Docker Registry (Docker Hub: https://hub.docker.com/).
Command:
docker image pull <ImageName>:<ImageTag>
docker image pull redis:latest
- Example

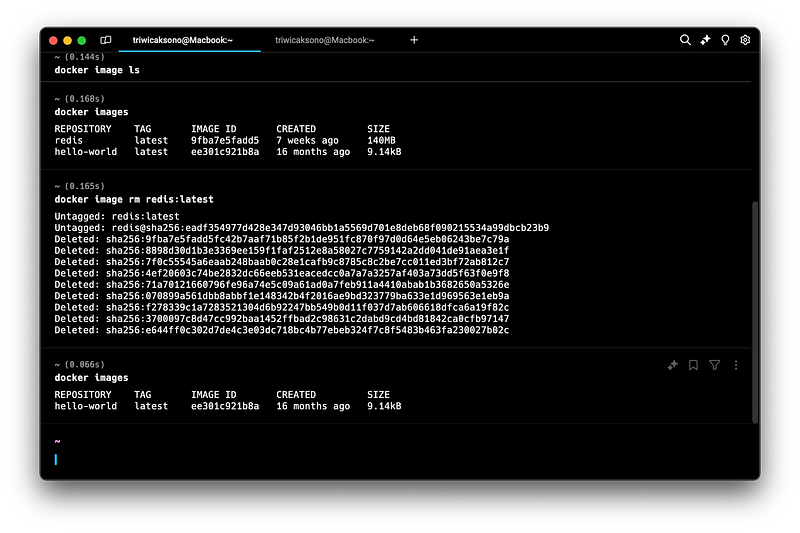
❌ Delete Image
Delete the Docker Image if we don’t want to use it.
⚠️ You can’t delete a Docker Image if a Container is using the image.
Command:
docker image rm <ImageName>:<ImageTag>
docker image rm redis:latest
- Example
📦 Docker Container
A Docker container is an active instance of a Docker image, providing an isolated, lightweight environment for running applications consistently across various systems. It bundles all necessary components, making it a crucial tool for efficient software development and deployment.
- A single Docker image can spawn multiple containers, each requiring a unique name to avoid conflicts.
- Once a container is created, the associated image cannot be deleted because the container directly references the image’s contents rather than duplicating them.
- Like an application that must be launched after installation, containers need to be explicitly started to function after their creation.
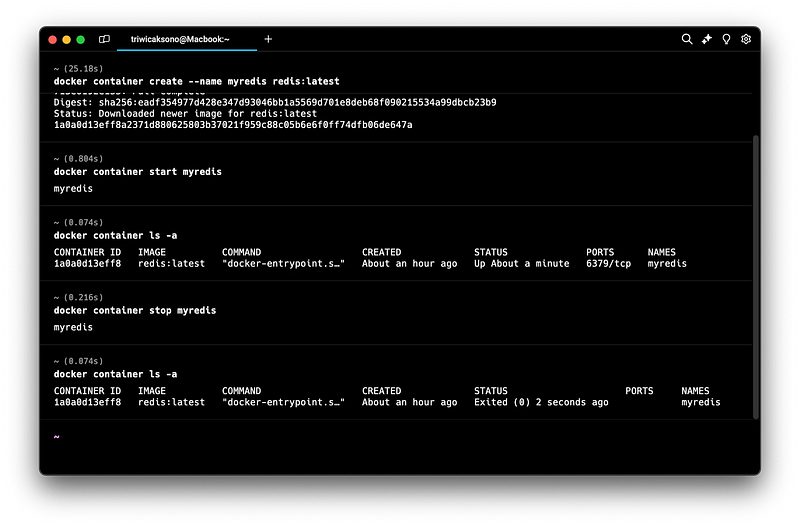
📋 List All Container
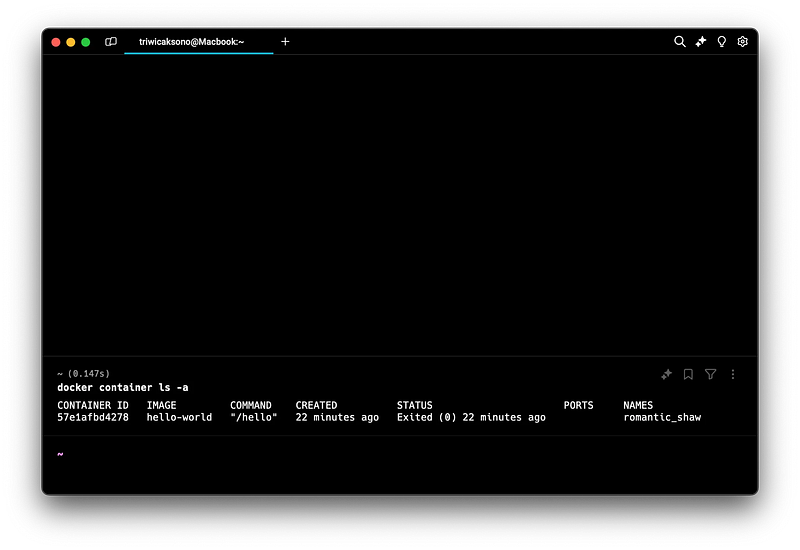
To view all containers, whether they are running or stopped, use the command:
docker container ls -a
If you only want to see the containers that are currently running, use the command:
docker container ls
- Example
✏️ Create Container
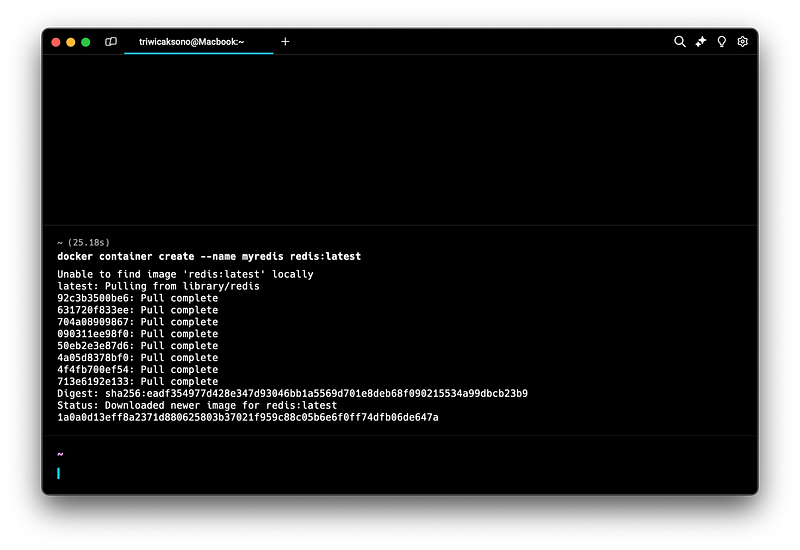
To create a container, use the command:
docker container create --name <ContainerName> <ImageName>:<ImageTag>

docker container create --name myredis redis:latest
Where you can find the image name?
- You can explore available Docker Images from the Docker Registry (Docker Hub)

- Explore Menu for Listing Docker Images:
An “Explore” menu provides a comprehensive list of available Docker images. This menu allows users to browse through images, showing essential details like the image name, size, tags, and official status, offering an organized view of the images available in the registry or locally. - Search Input for Searching Docker Images by Name:
A search bar enables users to quickly find Docker images by typing the image name or related keywords. This feature streamlines the process of locating specific images, whether from Docker Hub or the local system, by returning relevant results as the user types. - Docker Image Categories:
Images are grouped into categories for easier navigation, such as “Official Images” for trusted and verified images, “Popular Images” for commonly used images, and custom categories like “Web Servers”, “Databases”, or “Programming Languages”. This categorization helps users discover images based on their specific needs or use cases.
- Example
🔄 Start Container
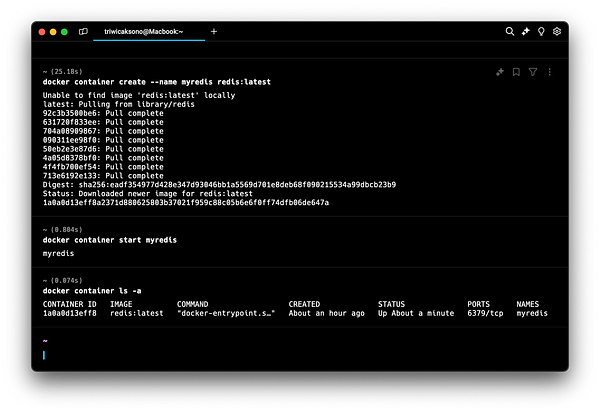
To start a container that you’ve already created, use the command:
docker container start <ContainerID>
or
docker container start <ContainerName>

docker container start myredis
- Example
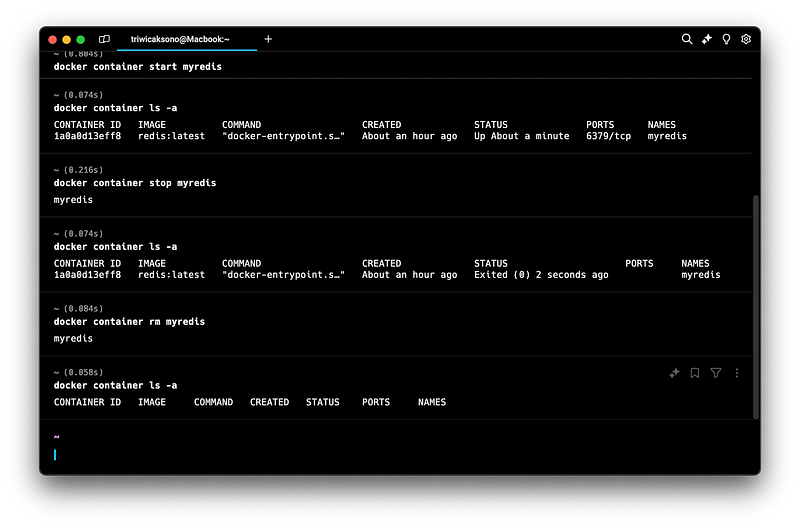
⛔️ Stop Container
To stop a container that you’ve already created, use the command:
docker container stop <ContainerID>
or
docker container stop <ContainerName>

docker container stop myredis
- Example
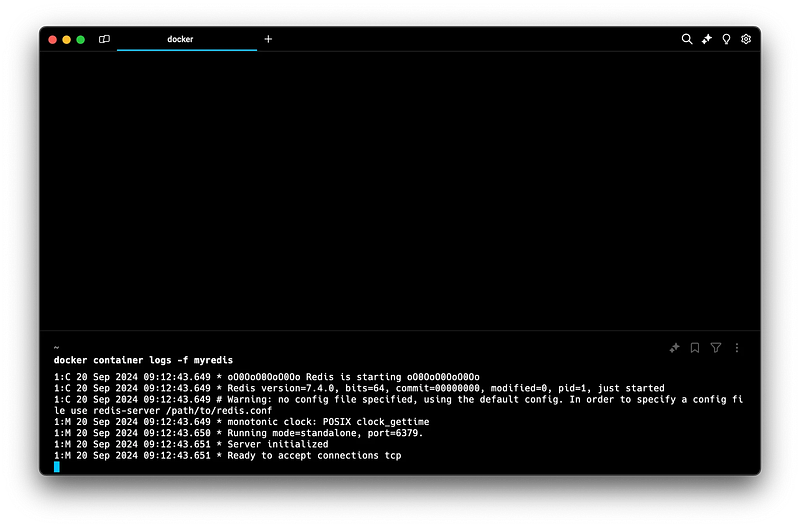
🗒️ Container Logs
- When issues arise with an application running in a container, it is often helpful to check the application’s logs for detailed information.
- This allows us to understand what happened in the application, making it easier to troubleshoot problems.
- To view the logs for an application in a container, use the command:
docker container logs <ContainerID>
or
docker container logs <ContainerName>

docker container logs myredis
- To view the logs in real-time, use the command:
docker container logs -f <ContainerID>
or
docker container logs -f <ContainerName>

docker container logs -f myredis
Press
CTRL + Cto exit from logs screen and back to your terminal.
- Example
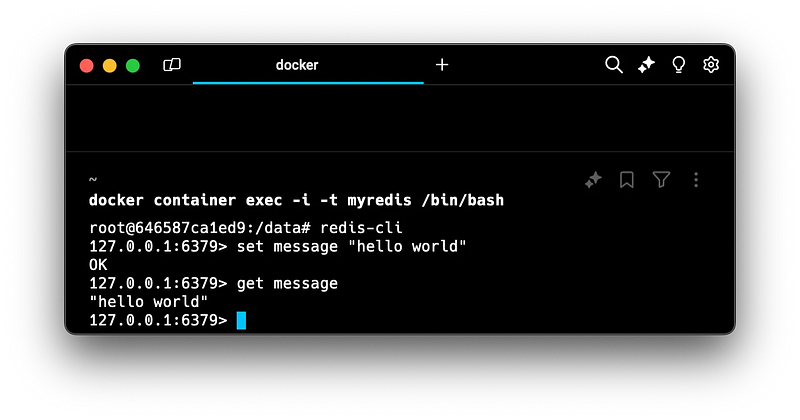
🖲️ Container Exec
When we create a container, the applications inside it are typically only accessible from within the container. Therefore, it is sometimes necessary to access the container itself.
To enter a container, we can use the Container Exec feature, which allows us to execute commands within the container.
To access the container, you can run a bash shell script inside the container using Container Exec with the command:
docker container exec -i -t <ContainerID> /bin/bash
docker container exec -i -t <ContainerName> /bin/bash

docker container exec -i -t myredis /bin/bash
-iis the interactive flag that keeps the input active.-tallocates a pseudo-TTY (terminal access)./bin/bashis an example of a command you might run inside the container.- Example
🔭 Container Port
When running a container, it is isolated within Docker, meaning the host system (e.g., your laptop) cannot directly access the applications inside the container. To interact with the container directly, you would use Container Exec.
Applications typically run on specific ports; for example, Redis runs on port 6379. You can check which ports are used by viewing the list of all containers.
Docker provides port forwarding capabilities, which allow you to map a port on the host system to a port inside the container. This is useful for exposing a container’s ports to the outside world through the host system.
⚠️ Docker does not support modifying the port mappings of an existing container directly. To change or add port forwarding for a container, you need to recreate the container with the new port mappings.
To set up port forwarding, use the following command when creating the container:
docker container create --name <ContainerName> --publish <HostPort>:<ContainerPort> <ImageName>:<ImageTag>
If you need to set up port forwarding for multiple ports, you can add the --publish parameter multiple times.
Alternatively, --publish can be shortened to -p.
You can map multiple ports from the container to the host. For example:
docker container create --name <ContainerName> -p <HostPort>:<ContainerPort> <ImageName>:<ImageTag>

docker container create --name <ContainerName> -p 8080:80 -p 443:443 <ImageName>:<ImageTag>
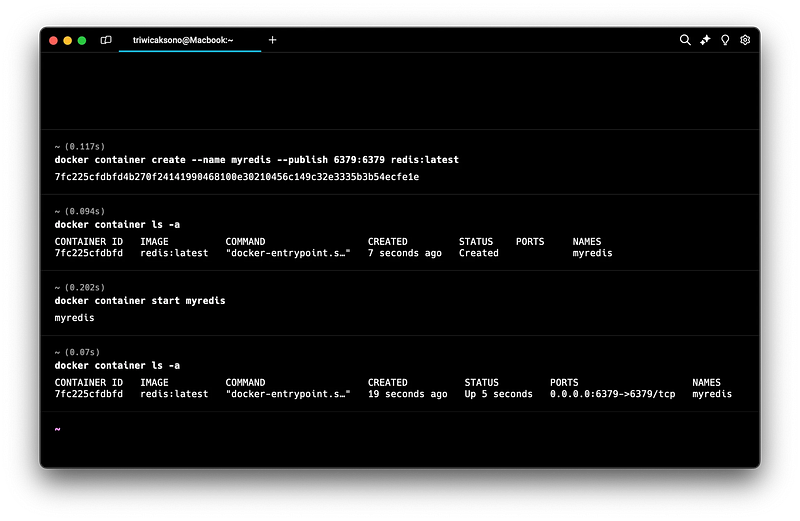
- Example:
- Redis Container
docker container create --name myredis --publish 6379:6379 redis:latest
docker container ls -a
docker container start myredis
docker container ls -a
- Now try to connect Redis with Redis Client (Redis Desktop Manager)


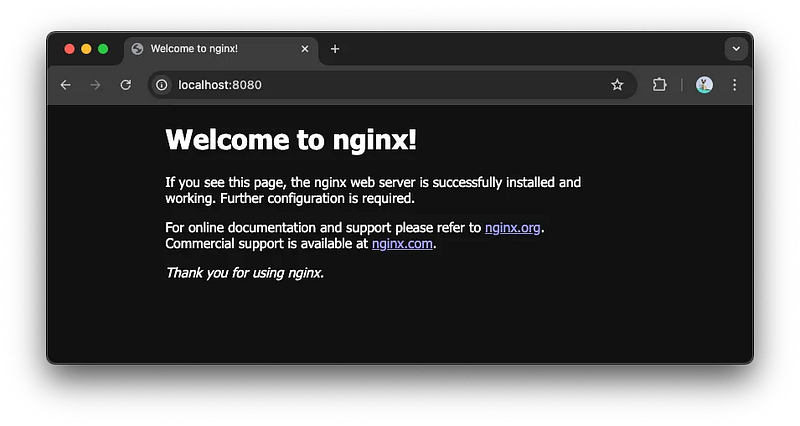
- Nginx Container
docker container create --name local-nginx --publish 8080:80 nginx:latest
docker container ls -a
docker container start local-nginx
docker container ls -a

- Now you can test open your browser
localhost:8080
❌ Delete Container
To remove a container that has stopped, use the command:
docker container rm <ContainerID>
or
docker container rm <ContainerName>

docker container rm myredis
- ℹ️ Example
❇️ Docker Run Command
What is docker run and How to Use It?
docker run allows you to create and start a container from an image in one step.
Here’s a quick overview of how to use it.
Basic Usage
docker run <Options> <ImageName>
- <Options>: Flags to control container behavior (e.g., detached mode, port mapping).
- <ImageName>: The image to run (e.g.,
nginx,ubuntu).
Example Options
1. Detached Mode (d): Run the container in the background.
docker run -d nginx
2. Assigning a Name (-name): Give the container a custom name for easier management.
docker run --name my-container -d nginx
3. Port Mapping (p): Map a container’s internal port to the host.
docker run --name my-container -d -p 8080:80 nginx
🗃️ Docker Volumes and Bind Mounts
When working with containers, it’s often necessary to persist data even after the container is stopped or removed. Docker offers two main ways to manage data: volumes and bind mounts.
Docker Volumes
- Data Persistence: Volumes store data outside the container’s filesystem, allowing it to persist even if the container is deleted.
- Ease of Use: Volumes are managed by Docker, making them easy to create, mount, and manage.
- Performance: Volumes offer the best performance when it comes to reading and writing data compared to other options like bind mounts.
- Isolation: Volumes are stored in a part of the host filesystem that is managed by Docker, ensuring isolation from other data on the host.
Creating and Using Volumes
1. Create a Docker volume:
docker volume create <VolumeName>

docker volume create my-data
2. Run a container with the volume attached:
docker run -d -p <HostPort>:<ContainerPort> --name <ContainerName> -v <VolumenName>:<ContainerPath> <ImageName>:<ImageTag>

docker run -d -p 8080:80 --name my-app-volume -v my-data:/usr/share/nginx/html nginx:alpine
This command mounts the my-data volume to the /usr/share/nginx/html directory inside the container, where Nginx serves files.
To verify that the volume is working, you can update or inspect files within this volume. Since it’s managed by Docker, you can manipulate the files through Docker commands.
Managing Volumes
Listing Volumes: To see all volumes on your system:
docker volume ls
Inspecting a Volume: Get detailed information about a volume:
docker volume inspect <VolumeName>

docker volume inspect my-data

# inspect docker container that use volume
docker container inspect <ContainerName>
- Copy the local file to Volume: to replace the default file on the nginx HTML file.
1. First, check on localhost:8080 :

2. Copy a file from your host into the running container and the volume:
<!DOCTYPE html>
<html>
<head>
    <title>Hello, Docker Volume!</title>
</head>
<body>
    <h1>Hello, World!</h1>
    <h2>New files using Docker Volume<h2>
</body>
</html>
Create a sample index.html file :
docker cp <HostPath> <ContainerName>:<ContainerPath>

docker cp ./index.html my-app-volume:/usr/share/nginx/html

Then copy index.html to volume using this command:
docker cp <HostPath> <ContainerName>:<ContainerPath>

docker cp ./index.html my-app-volume:/usr/share/nginx/html
In this setup, the index.html file will be located in the /usr/share/nginx/html directory, and since the volume is mounted, the file will remain persistent.
3. Now refresh localhost:8080

- Removing a Volume: Permanently delete a volume and all its data:
docker volume rm my-data
Bind Mounts
Bind mounts are another way to persist and share data with containers by mounting a directory or file from the host machine into the container.
- Direct Host Access: With bind mounts, you can directly map a directory or file from the host to the container. This is useful for scenarios like development environments where you want to see changes in real-time.
- Flexibility: Bind mounts provide more flexibility for cases where you need the container to interact with specific files or directories on the host.
- Less Isolation: Unlike volumes, bind mounts are not managed by Docker and have fewer guarantees about the state of the data.
Using Bind Mounts
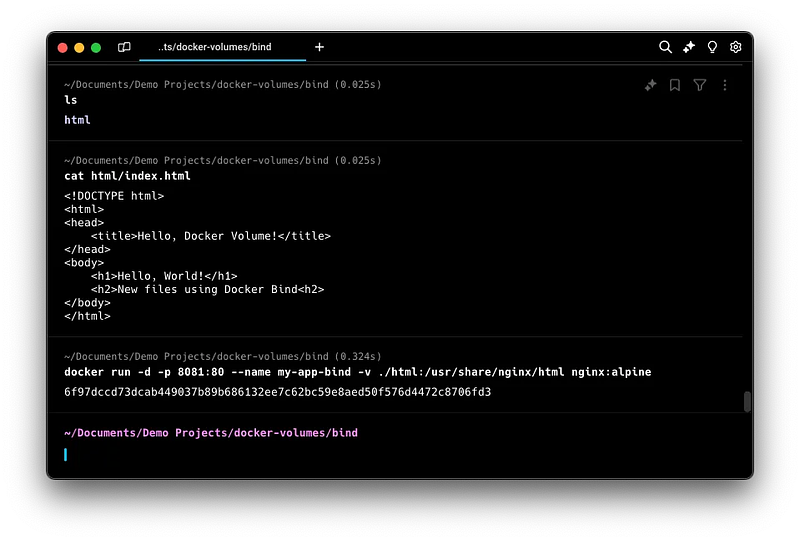
1. Create a sample index.html file inside html folder:
<!DOCTYPE html>
<html>
<head>
    <title>Hello, Docker Volume!</title>
</head>
<body>
    <h1>Hello, World!</h1>
    <h2>New files using Docker Bind<h2>
</body>
</html>
2. Run a container with a bind mount: Replace <HostPath> with the actual path on your host system. This directory’s content will be directly available inside the container at /usr/share/nginx/html.
docker run -d -p <HostPort>:<ContainerPort> --name <ContainerName> -v <HostPath>:<ContainerPath> <ImageName>:<ImageTag>

docker run -d -p 8080:80 --name my-app-bind -v ./html:/usr/share/nginx/html nginx:alpine

Use Cases and Considerations
- Volumes are generally preferred for production environments because they offer better isolation and are easier to manage.
- Bind Mounts are useful in development when you need to access or modify files on the host system in real-time and see the changes immediately in the container.
🖌️ Building Your First Docker Image
Before creating your first image, you need to understand Dockerfile.
Dockerfile: This is a text file with instructions on how to build a Docker image. It defines what goes into the image, including the base image, application code, environment variables, and commands to run.
Let’s create a simple HTML application that displays “Hello, World!” in a browser.
Creating a Dockerfile
1. Create a new directory for your project and navigate into it:
mkdir my-docker-app
cd my-docker-app
2. Inside this directory, create an index.html file with the following content:
<!DOCTYPE html>
<html>
<head>
    <title>Hello, Docker!</title>
</head>
<body>
    <h1>Hello, World!</h1>
</body>
</html>
3. Create a file named Dockerfile and add the following content:
# Use an official Nginx image as a base
FROM nginx:alpine

# Copy the current directory contents into /usr/share/nginx/html
COPY . /usr/share/nginx/html
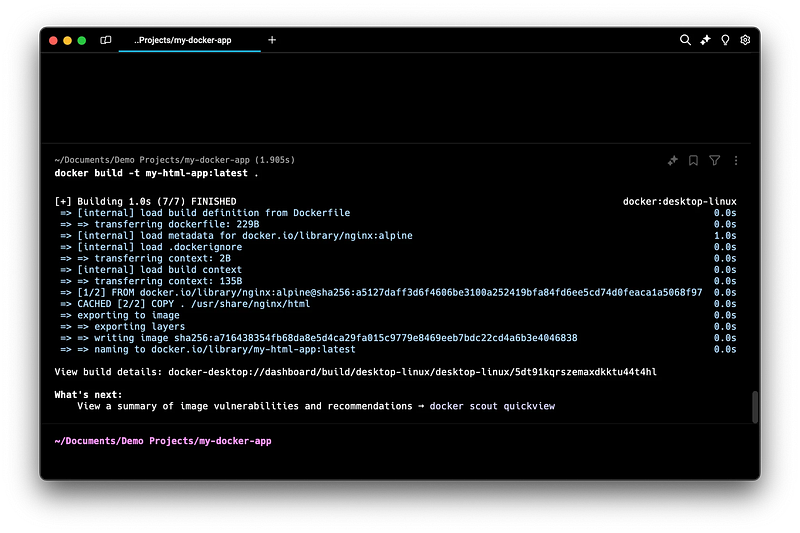
Building the Image
- Save the
Dockerfile. - Build the Docker image using the following command: This command creates a new Docker image named
my-html-appusing the instructions in theDockerfile.
docker build -t <ImageName>:<ImageTag> .

docker build -t my-html-app:latest .
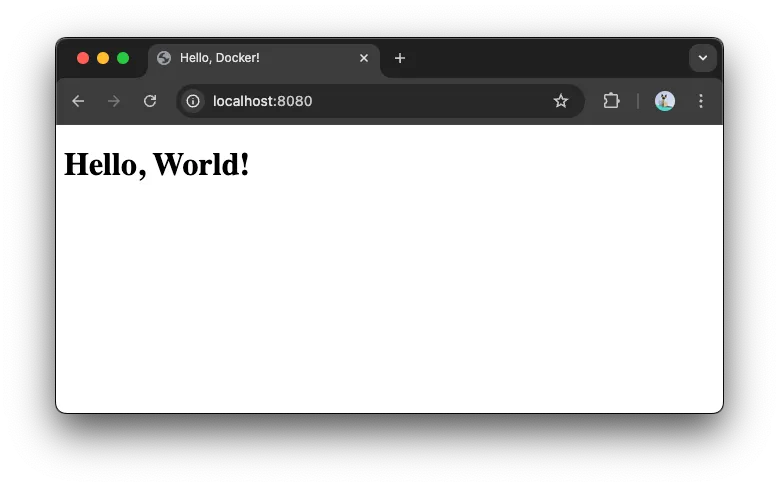
Running the Container
Run the newly created Docker image:
docker run -d --name my-html-app-container -p 8080:80 my-html-app:latest

This command runs a container from the my-html-app image and maps port 80 in the container to port 8080 on your host machine. You can access the application by opening a web browser and navigating to http://localhost:8080
🛳️ Pushing Images to Docker Registry
If you want to share your Docker image, you can push it to a Docker registry like Docker Hub.
⚙️ Docker Hub Setup
1. Create a Docker Hub account if you don’t have one already.
2. Log in to Docker Hub from the command line:
docker login
3. Go to your browser and visit https://login.docker.com/activate
4. Input your OTP that printed on your terminal
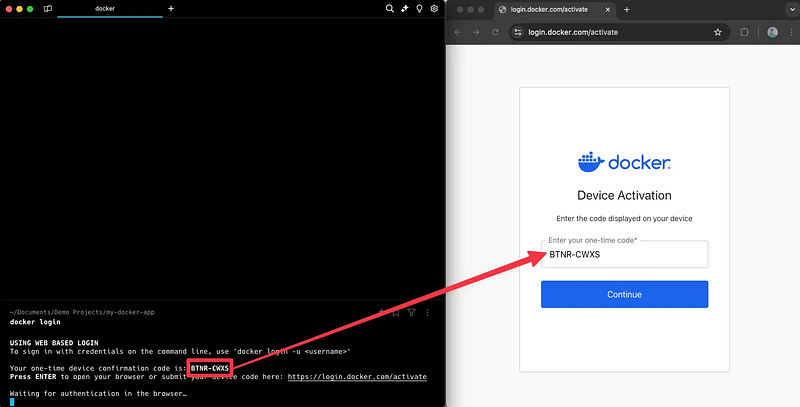
Make sure you already logged in to your Docker Account on the browser, if not you need to sign in first.

Once confirmed you will have results like this, and your terminal will show Login Succeeded:


🏷️ Docker Tag
The docker tag command is used to create a tag for an existing image, assigning a new name or version to it. This is useful when you want to push an image to a registry with a specific name or tag.
docker tag <SourceImageName>:<SourceImageTag> <TargetImageName>:<TargetImageTag>

Parameters:
<SourceImageName>:<SourceImageTag>: The name (and optional tag) of the existing image that you want to tag. If the tag is omitted, Docker assumes:latest.<TargetImageName>:<TargetImageTag>: The new name (and optional tag) you want to assign to the image.
Example:
Tagging an image with a new name and version:
docker tag my-app:latest myrepo/my-app:v1.0
In this example:
my-app:latest: The source image you want to tag.myrepo/my-app:v1.0: The target image name and tag. After tagging, you can push it to a Docker registry under this new tag.
The docker tag command simply creates a new reference to the existing image; it does not duplicate the image.
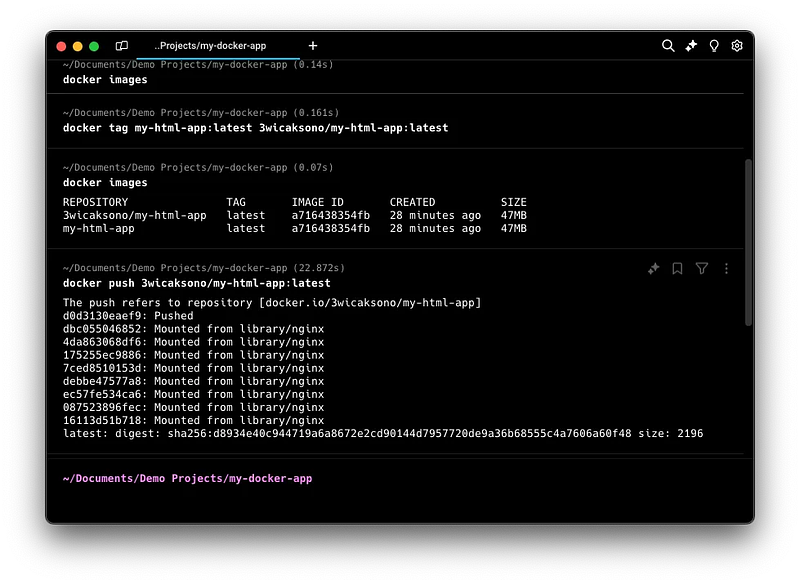
🚢 Tagging and Pushing an Image
1. Tag the image with your Docker Hub username and the repository name:
docker tag my-html-app:latest <YourUsername>/my-html-app:latest
2. Push the image to Docker Hub:
docker push username/my-html-app:latest
💡 Best Practices and Tips
- Use Official Images: Start with official images from Docker Hub when possible, as they are maintained and regularly updated for security and performance.
- Image Size Optimization: Use smaller base images (e.g.,
alpine) to keep the image size small. - Keep Images Small: Minimize the size of Docker images by using multi-stage builds and only including necessary files and dependencies. This reduces the attack surface and speeds up downloads.
- Utilize
.dockerignoreFiles: Use a.dockerignorefile to exclude unnecessary files and directories from your image builds, keeping images clean and reducing build time. - Secure Your Containers: Run containers with the least privilege principle in mind. Avoid running as the root user and regularly update images to patch vulnerabilities.
- Leverage Environment Variables: Use environment variables for configuration, allowing for flexibility and security in managing sensitive information without hardcoding it in your images.
- Implement Version Control: Tag images with specific version numbers instead of using
latest. This helps maintain control over which version is deployed in production. - Container Management: Use meaningful names for containers and clean up unused containers, images, and volumes with
docker system prune. - Use Volumes for Data Persistence: Use Docker volumes for data that needs to persist beyond the life of a container, ensuring data is retained even if the container is removed.
- Monitor Resource Usage: Regularly monitor the resource usage of your containers (CPU, memory, disk) to identify and resolve performance issues.
- Keep Docker Up to Date: Regularly update Docker to the latest version to benefit from new features, performance improvements, and security patches.
- Document Your Setup: Maintain clear documentation of your Docker setup, including how to build, run, and troubleshoot your containers for easier onboarding and collaboration.
- Use Docker Compose for Multi-Container Applications: Simplify the management of multi-container applications with Docker Compose, allowing you to define and run multi-container applications easily.
📣 Conclusion
This guide has covered the basics of Docker, from installation to deploying a containerized application. Key topics such as images, containers, volumes, and registries have been explored, along with practical skills like creating Dockerfiles and pushing images to Docker Hub. With this foundational knowledge, you’ll be prepared to simplify development, maintain consistency across environments, and effectively manage applications. Docker is a powerful tool for modern software development and deployment.
References: