Introduction
What is Docker Compose?
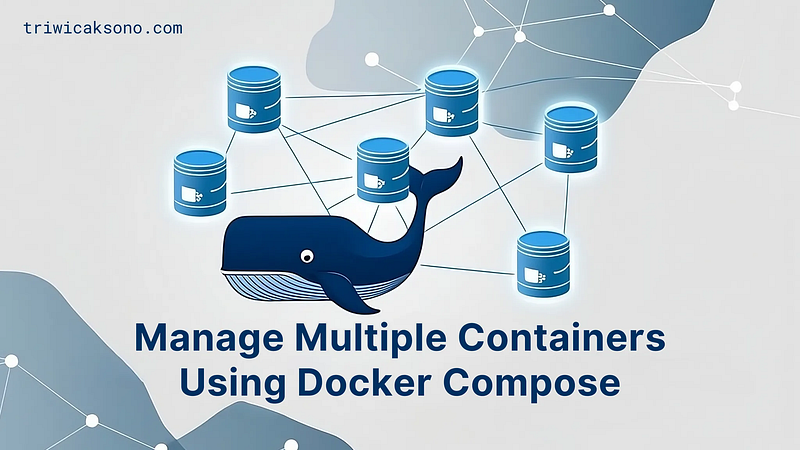
Docker Compose is a handy tool to set up and manage apps with multiple containers using just one configuration file, usually called docker-compose.yml or docker-compose.yaml.
This file lists all the services, networks, and storage your app needs. With Docker Compose, you can start, stop, and control everything with a single command.
Both
.ymland.yamlextensions work the same way, so you can choose whichever you like.
Benefits of Using Docker Compose
- Easier Management of Multiple Containers: Instead of dealing with each container one by one, Docker Compose lets you control all of them with a single file and a simple command. This makes managing your application much less complicated.
- Consistent Setups Across the Team: Docker Compose helps everyone on your team use the exact same environment. This means fewer surprises and problems when moving your app from development to testing to production.
- Separate Services to Prevent Conflicts: By keeping each part of your app in its own container, Docker Compose ensures they don’t interfere with each other. This avoids issues that can happen when different parts need different tools or versions.
- Flexible Settings: You can easily adjust configurations using variables, making it simple to adapt your app for different situations like local development or live production.
- Simple Scaling Up or Down: If you need more (or fewer) instances of a service, Docker Compose lets you add or remove them easily with just a quick command or a small change in the setup.
Use Cases for Docker Compose
- Running Apps with Multiple Parts: If your app has a few different stack (like a frontend, backend, database), Docker Compose lets you run them all together with just one command. Super convenient!
- Keeping Development Setups Consistent: With Docker Compose, everyone on your team uses the same environment. This means fewer issues like “it works on my machine” and more smooth sailing during development.
- Easy Testing and Automation: Docker Compose makes it easy to create setups that look just like your production environment, which is perfect for testing and continuous integration.
Prerequisites
To get started with Docker Compose, you’ll need a few things:
- Docker Installed on Your Computer: First, you need to have Docker itself installed. Docker is the main software that allows you to run containers, which are like lightweight virtual machines.
- Docker Compose Installed: You’ll also need Docker Compose installed. On Windows and Mac, Docker Compose usually comes bundled with Docker Desktop. On Linux, you might need to install it separately.
- Basic Familiarity with Docker Concepts: Having a basic understanding of Docker terms like “containers” and “images” can be helpful when using Docker Compose.
Hey, don’t worry if you’re new to Docker! Check out my earlier article, A Beginner’s Guide to Docker: From Installation to Deployment. It covers all the basics including images, containers, volumes, and more! so it’s perfect if you’re just starting out.
Once you have these prerequisites, you’ll be ready to use Docker Compose to manage and run your multi-container applications easily.
Alright, now that you’ve got the hang of Docker, let’s kick things up a notch and dive into Docker Compose. Trust me, it’s a game-changer when it comes to juggling multiple Docker containers without breaking a sweat.
Understanding Docker Compose Format
Format docker-compose.yaml file:
services:
  <ServiceName>:
    image: <ImageName>:<ImageTag>
    container_name: <ContainerName>
    restart: <RestartPolicy>
    environment:
      <EnvKey>: <EnvValue>
    ports:
      - "<HostPort>:<ContainerPort>"
    volumes:
      - <VolumeName / HostPath>:<ContainerPath>
    networks:
      - <NetworkName>

  <ServiceName>:
    image: <ImageName>:<ImageTag>
    container_name: <ContainerName>
    restart: <RestartPolicy>
    environment:
      <EnvKey>: <EnvValue>
    ports:
      - "<HostPort>:<ContainerPort>"
    volumes:
      - <VolumeName / HostPath>:<ContainerPath>
    networks:
      - <NetworkName>

volumes:
  <VolumeName>:

networks:
  <NetworkName>:
    driver: bridge
Key Components:
<ServiceName>: A placeholder name for your service; replace it with your actual service name.<ImageName>:<ImageTag>: Specifies the Docker image and version to use for the container.<ContainerName>: Custom name for the container for easy identification.<RestartPolicy>: Configures the restart policy for the container.- Here’s an explanation of each Docker restart policy:
no: The container will not be restarted automatically. Use Case: This is the default behavior. Use it when you want the container to exit and not restart, such as for one-time tasks.
always: The container keeps restarting no matter what, unless you stop it yourself. Use Case: Great for things that need to be up all the time, like your website or a database.
on-failure: Useful for apps that might crash sometimes and you want them to try restarting a few times. Use Case: Useful for apps that might crash sometimes and you want them to try restarting a few times. Specify a maximum retry count (e.g., on-failure:5), limiting the number of restart attempts before giving up.
unless-stopped: The container restarts automatically unless you manually stop it. Use Case: Perfect for services you want running all the time but still want the option to stop them when needed.
<EnvKey>: <EnvValue>: Sets environment variables within the container, allowing you to pass configuration settings.
💡 For more details about environment variables check this article: Environment Variable in Docker Compose
<HostPort>:<ContainerPort>: Maps a port on the host to a port in the container, allowing external access to the service.<VolumeName / HostPath>:<ContainerPath>: Defines how data is stored and managed, ensuring persistence.<NetworkName>: Defines the networks the service connects to, allowing communication with other services on the same network.
💡 For more details about Networks in Docker Compose check this article: Networks in Docker Compose
Try Docker Compose
We will set up multiple containers using a docker-compose.yml file that configures two services:
- MariaDB (a database).
- phpMyAdmin (a web-based interface for managing the database).
Step 1: Create the Project Directory
Directory Structure
We will create project directory tree like this:
📂 mydb-project/
├── 📄 docker-compose.yml
└── 📄 .env
Start by creating a directory for the project. The name of this root folder will reflect the stack name in Docker, so name it accordingly.
mkdir mydb-project
cd mydb-project
Step 2: Create the docker-compose.yml File
Now, create the docker-compose.yml file that includes both the MariaDB and phpMyAdmin services.
services:
  mariadb:
    image: mariadb:latest
    container_name: my-mariadb
    restart: unless-stopped
    environment:
      MARIADB_ROOT_PASSWORD: ${MYSQL_ROOT_PASSWORD:-defaultrootpassword}
    #ports:
    #  - "3306:3306"
    volumes:
      - mariadb_data:/var/lib/mysql
    networks:
      - database_network

  phpmyadmin:
    image: phpmyadmin/phpmyadmin:latest
    container_name: my-phpmyadmin
    restart: unless-stopped
    environment:
      PMA_HOST: mariadb
      PMA_PORT: 3306
    ports:
      - "8080:80"
    depends_on:
      - mariadb
    networks:
      - database_network

volumes:
  mariadb_data:

networks:
  database_network:
    driver: bridge
- Environment Variables: Utilize the
.envfile for managing sensitive and dynamic configuration values like database passwords. This ensures portability across environments. - Volumes: Persistent storage for MariaDB is handled using the
mariadb_datavolume. It ensures that your data persists even if the container is stopped or removed. - Networks: The
mariadbservice is connected to thedatabase_network, which means only services within that network can chat with the database. This adds an extra layer of security. - Oh, and by the way, the port mapping for MariaDB is commented out, so it’s only reachable from inside Docker and the database_network. That means you can’t access MariaDB from outside.
- But hey, don’t worry! You can still use phpMyAdmin to manage it.
phpmyadminis the only service with an exposed port (8080:80), so that’s the only way to get in. This setup keeps things isolated and secure, making sure that MariaDB can only be managed through phpMyAdmin.
Step 3: Create the .env File
In the root directory, create a .env file to define environment variables for the database configuration. These variables will be used in your Docker Compose file.
MYSQL_ROOT_PASSWORD=rootpassword
Step 4: Run Docker Compose
- Navigate to the project folder: Ensure you’re in the root directory (
mydb-project/). - Run Docker Compose:
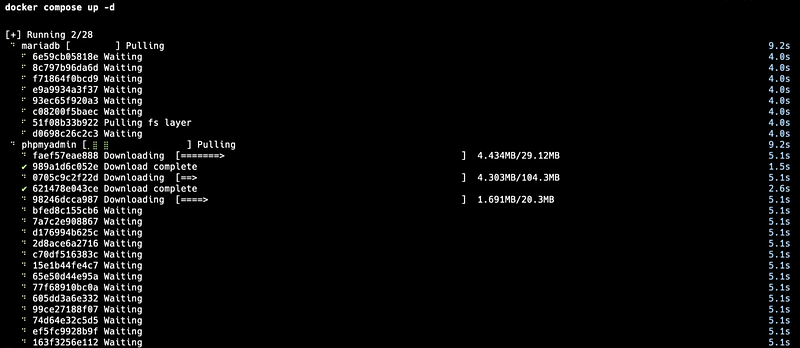
docker compose up -d
The -d flag runs the containers in the background (detached mode).
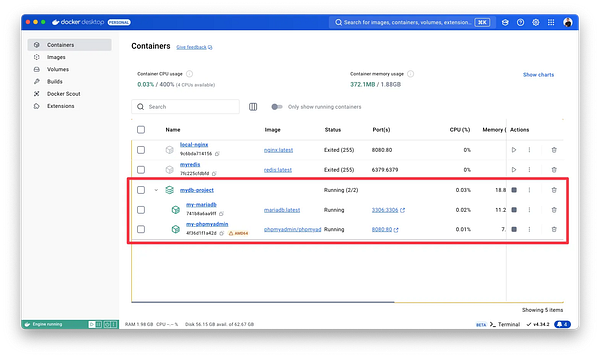
Step 5: Verifying the Setup
- phpMyAdmin will be accessible at
http://localhost:8080
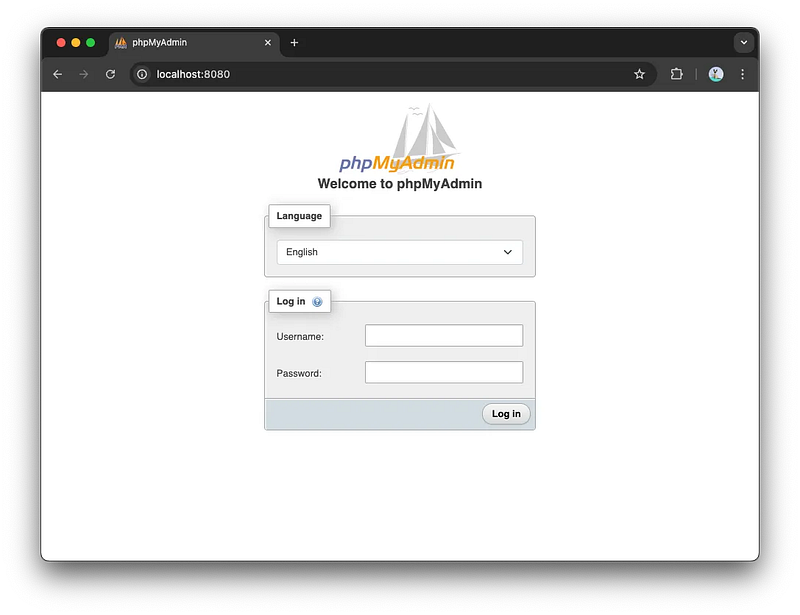
- You can connect to the MariaDB instance using the credentials from the
.envfile (or the default ones you set in thedocker-compose.yml).
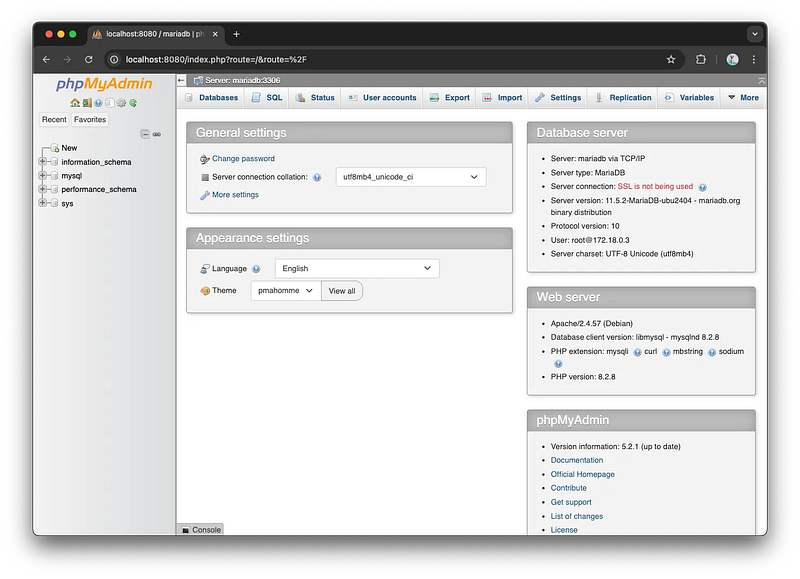
To see the running containers, you can run:
docker compose ls
To stop/start the containers and remove them, use:
docker compose stop
docker compose start
To remove all containers, use:
docker compose down
To manage specific service, use:
docker compose up -d <ServiceName>
docker compose stop <ServiceName>
docker compose start <ServiceName>
Conclusion
Docker Compose simplifies managing multi-container applications, whether you’re working with databases or complex microservices. By defining services in a single YAML file, you can easily control your application stack with just a few commands. This makes Docker Compose a critical tool for developers, CI/CD pipelines, and operations alike.
With this guide, you can set up and manage a MariaDB and phpMyAdmin stack using Docker Compose. Happy containerizing!
References:
Related Articles: